Scanning Process
1. Creating a New Project
1.1. Launch the Software
- Open the software – “EXScan Pro” located on the Desktop.
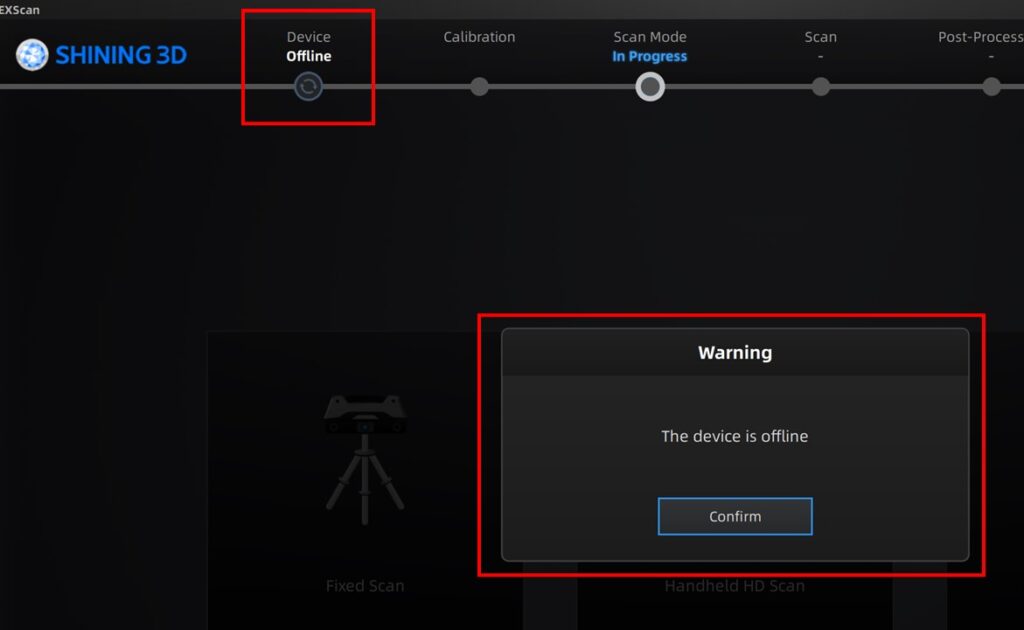
- Make sure the software has recognised the scanner. The status should display “Online”.
Note:
If the status displays “Offline”, ensure all cables are securely connected. If everything is correctly plugged in, try clicking “Refresh” or restart the software.”

1.2. Select Scanning Mode
- Select “Fixed Scan” in the software.
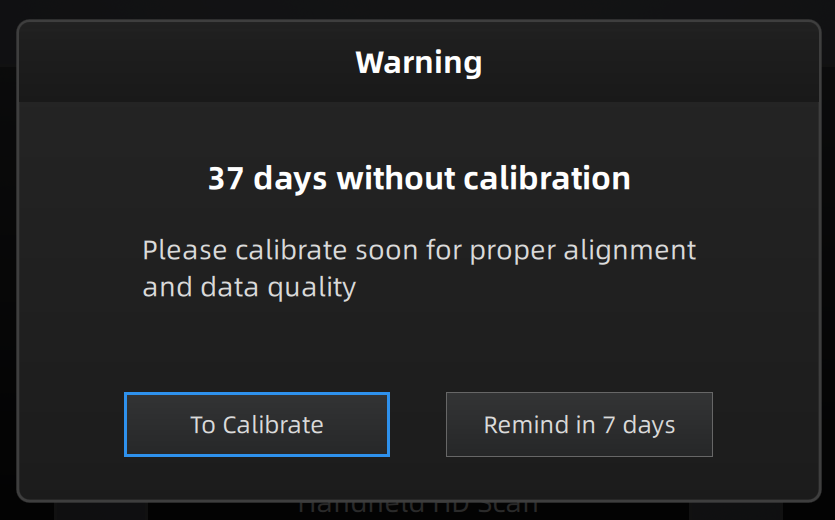
Note:
After selecting the scan mode, a calibration warning will appear. Click “Remind in 7 days”.
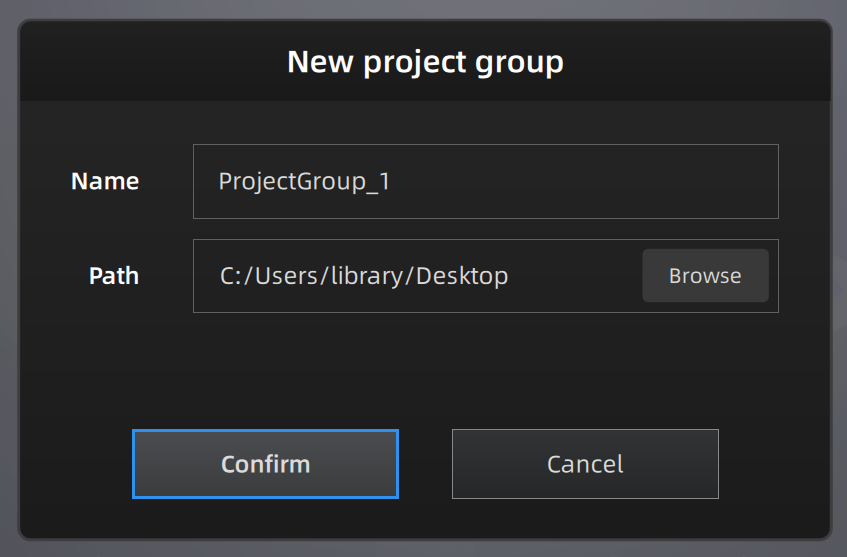
1.3. Create a Project
- Click “New Project” and enter the project name.
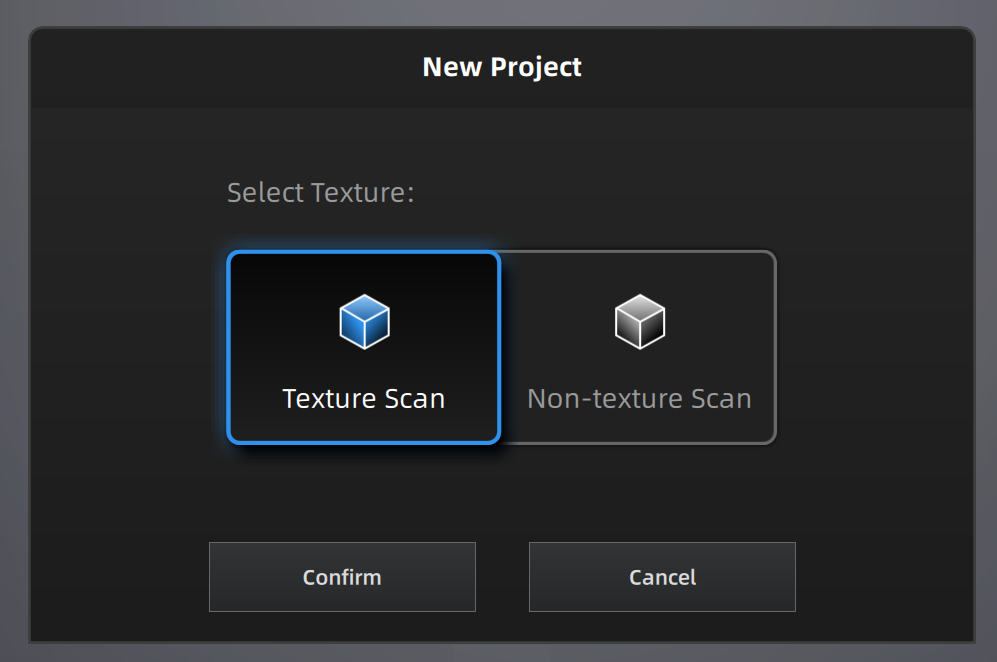
- By default, projects are saved to the Desktop.
- Select “Texture Scan” (with colour) or “Non-texture Scan” (without colour).
Note:
- Save the project on the laptop first to keep the software running smoothly during scanning.
- After completing the scanning and editing, users should transfer their files online or to their own storage devices. Files saved in laptops will be erased when the laptop is rebooted. The Library is not responsible for any leakage of personal data or data loss.
1.4. Select Align Mode
Select the align mode according to the object’s characteristics:
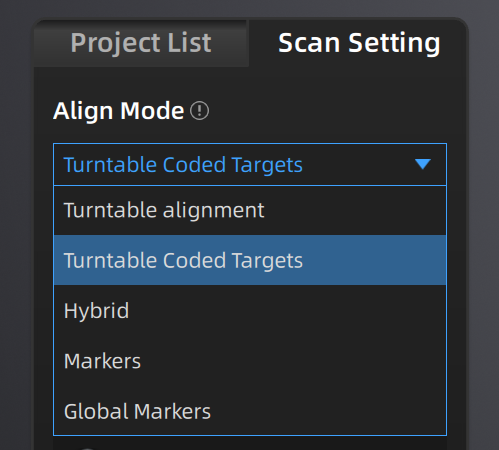
Turntable Alignment:
- Ideal for objects with rich surface detail.
Turntable Coded Target Alignment:
- Best for objects with simple, regular surface features.
- Use the pattern on the turntable for recognition.
- Ensure the object does not cover too many of the coded targets on the turntable to allow accurate alignment.
The below align modes require markers, please note that markers are not provided.
Hybrid Alignment:
- Combine features and markers for alignment.
- Best for objects with rich surface details.
Markers Alignment
- Use special markers sticking on the object for recognition.
Global Markers Alignment
- Global markers must be applied to the object’s surface and global markers must be pre-scanned.
Note:
View more details about each align mode by hovering over the “i” icon.
2. Preview the Scanning
2.1. Place the Object
- Place the object on the turntable and make sure it remains stable.
2.2. Preview the Scan
- Preview the scan in the camera window. Adjust the settings as needed before starting the scan.

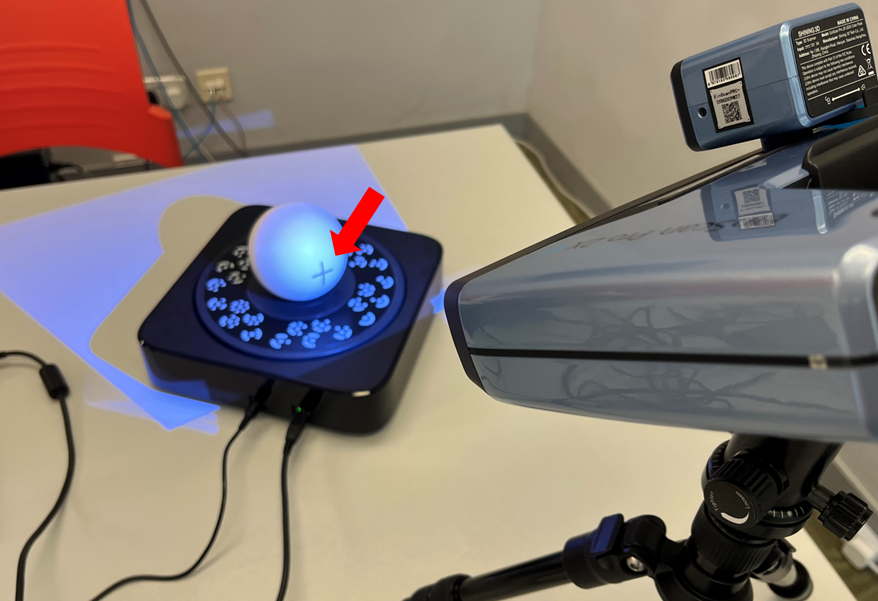
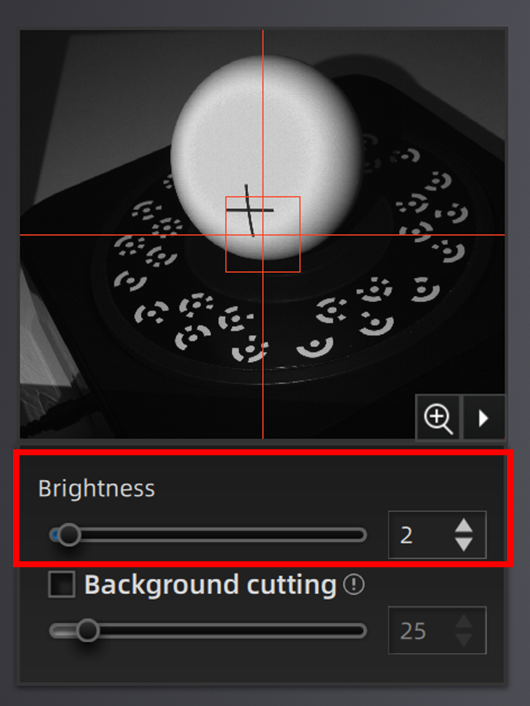
2.3. Adjust the Angle & Distance of Scanner
Maintain an appropriate distance and angle between the scanner and the object:
1. On object:
The cross should be visible on the surface of the object.
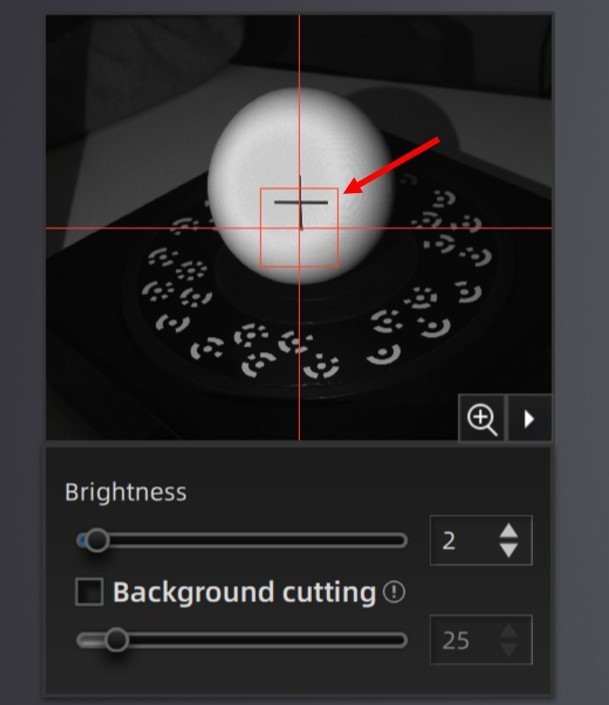
2. On screen:
Ensure the cross is placed inside the square shown in the camera preview.
How to adjust:
- Adjust the tripod’s tray section to set the scanner to the desired angle.
- Move the turntable to adjust the distance between the object and the scanner.
2.4. Adjust the Brightness
Ensure the camera preview has proper brightness:
- The object is clearly visible with minimal red displayed.
How to adjust:
- Use the arrow OR drag the slider below the camera preview to adjust the brightness.
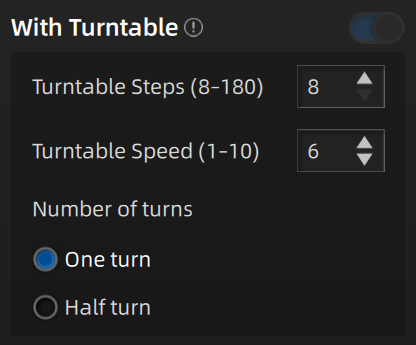
2.5. Adjust the Turntable Steps
Set the turntable steps between 8 and 180, with a default of 8.
- Increasing the number of steps captures more complete data at multiple angles, but it also increases scanning time.
Note:
Adjust the turntable speed to stabilise the object during turning.
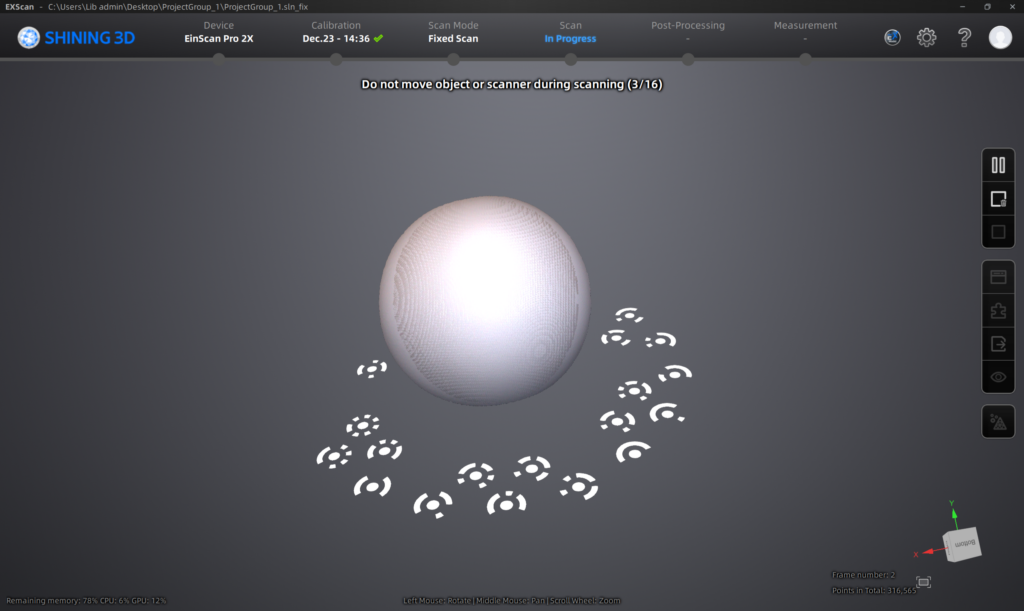
3. Scanning the Object
3.1. Start Scanning
- Click the “Scan” button on the screen.

3.2. Monitor Progress
- Watch the live feed on the screen to monitor progress while scanning.
Note:
Ensure the object does not shake or move during the scan.
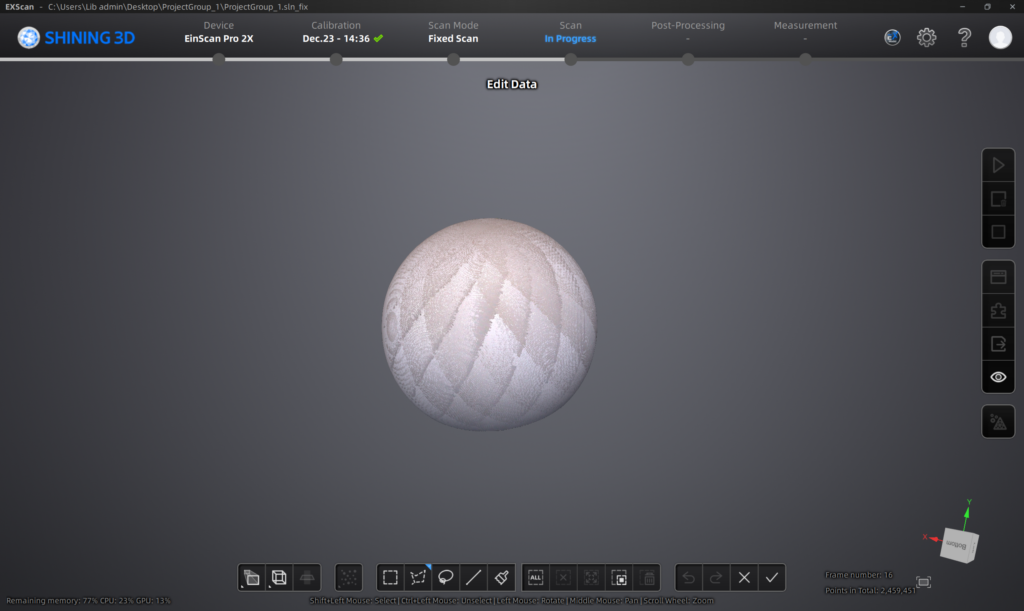
3.3. Edit Scan
Once the scan is complete, use the editing tools to adjust the scan data.
- Click “Apply” to finalise the editing; the edited data will be saved automatically.
Note:
If the scan result is unsatisfactory, delete the existing data, adjust the settings, and restart the scan.
3.4. Finish Scanning
- Check that all necessary data has been captured. If the scan is complete, continue to post‑processing.
Note:
- If the scan result is unsatisfactory, delete the existing data, adjust the settings, and restart the scan.
- Users may export the scan before point‑cloud optimisation; however, only the .asc format can be saved.
Post-Processing
1. Generate Point-cloud
- Click “Optimise and save point cloud” to generate the optimised point‑cloud 3D data.
Note:
If necessary, export the point cloud as an .asc file.

on right side of the screen
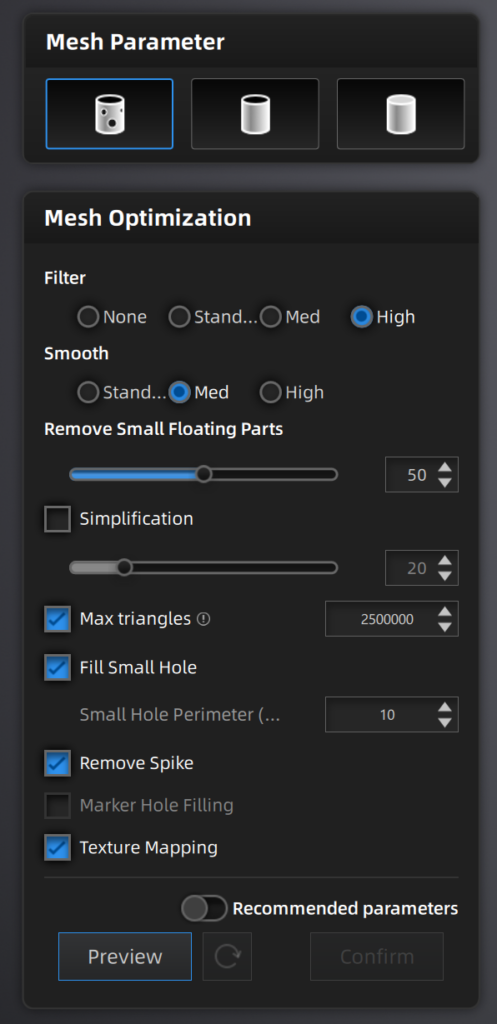
2. Create Mesh
- Click “Mesh Model” to generate the mesh.
- Modify the post‑processing settings to achieve the best fit.
Note:
If any further steps are required (e.g., remapping or preparing for 3D printing), ensure that all holes in the 3D model are filled.
on right side of the screen
Exporting the Model
- Save the final 3D model in the desired format (e.g., STL, OBJ) for 3D printing or other uses.

- The default export location is invalid. Click “Desktop” to save the file to the desktop.
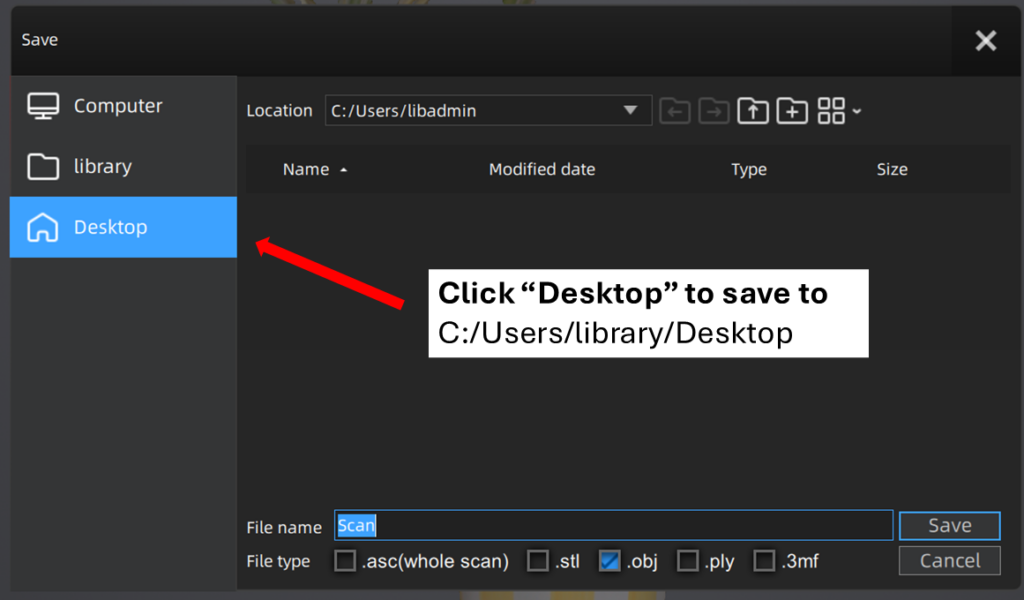
Note:
After completing the scanning and editing, users should transfer their files online or to their own storage devices. Files saved in laptops will be erased when the laptop is rebooted.